
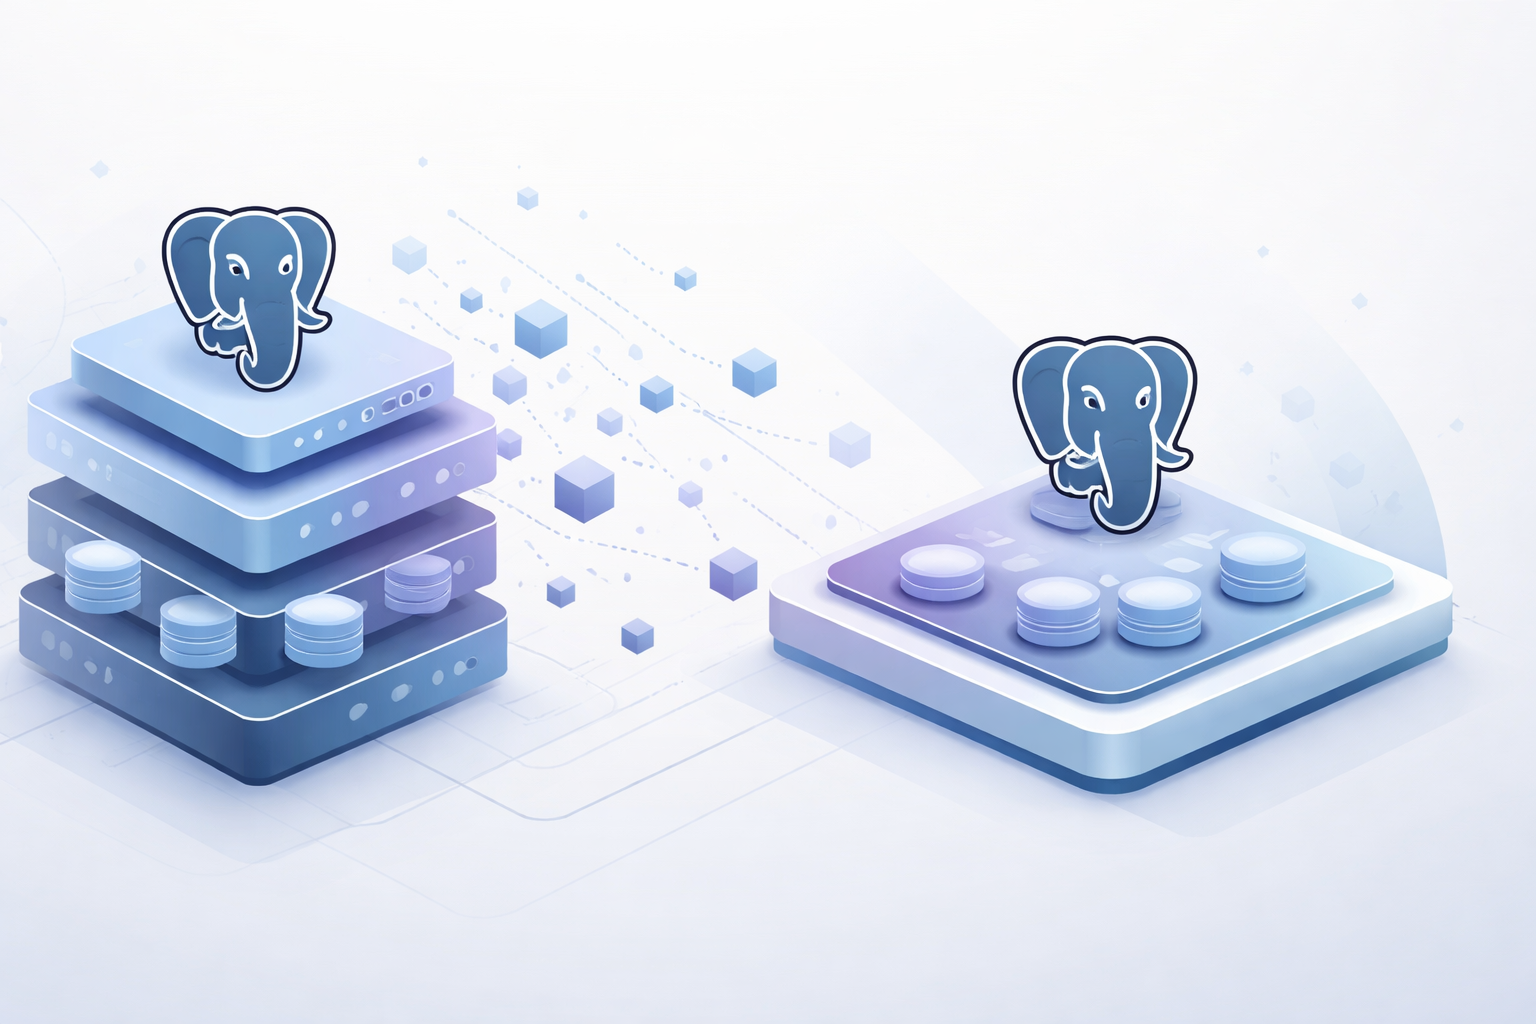
How I Removed NDB and Made PostgreSQL Native Again
Those disks showing 0 bytes are not broken. Neither is your exit strategy.

A few months ago, I inherited a PostgreSQL environment deployed through Nutanix NDB. The original purpose was solid: a development team needed multiple Postgres instances with rapid cloning and refresh capabilities. Time Machine snapshots, automated patching, the works.
Then the team got relocated. The databases stayed. The workloads kept running. But nobody was using Time Machine anymore. Nobody needed cloning. The patching orchestration sat idle.
At that point, NDB became pure overhead. License cost, management complexity, an extra layer between me and a straightforward Postgres VM. The rational move was to remove it.
Here is how that went, and why the process itself proves there is no lock-in.
What NDB Actually Does to Storage
Before walking through the removal, it helps to understand how NDB provisions database storage. This explains a detail that initially made me think something was broken.
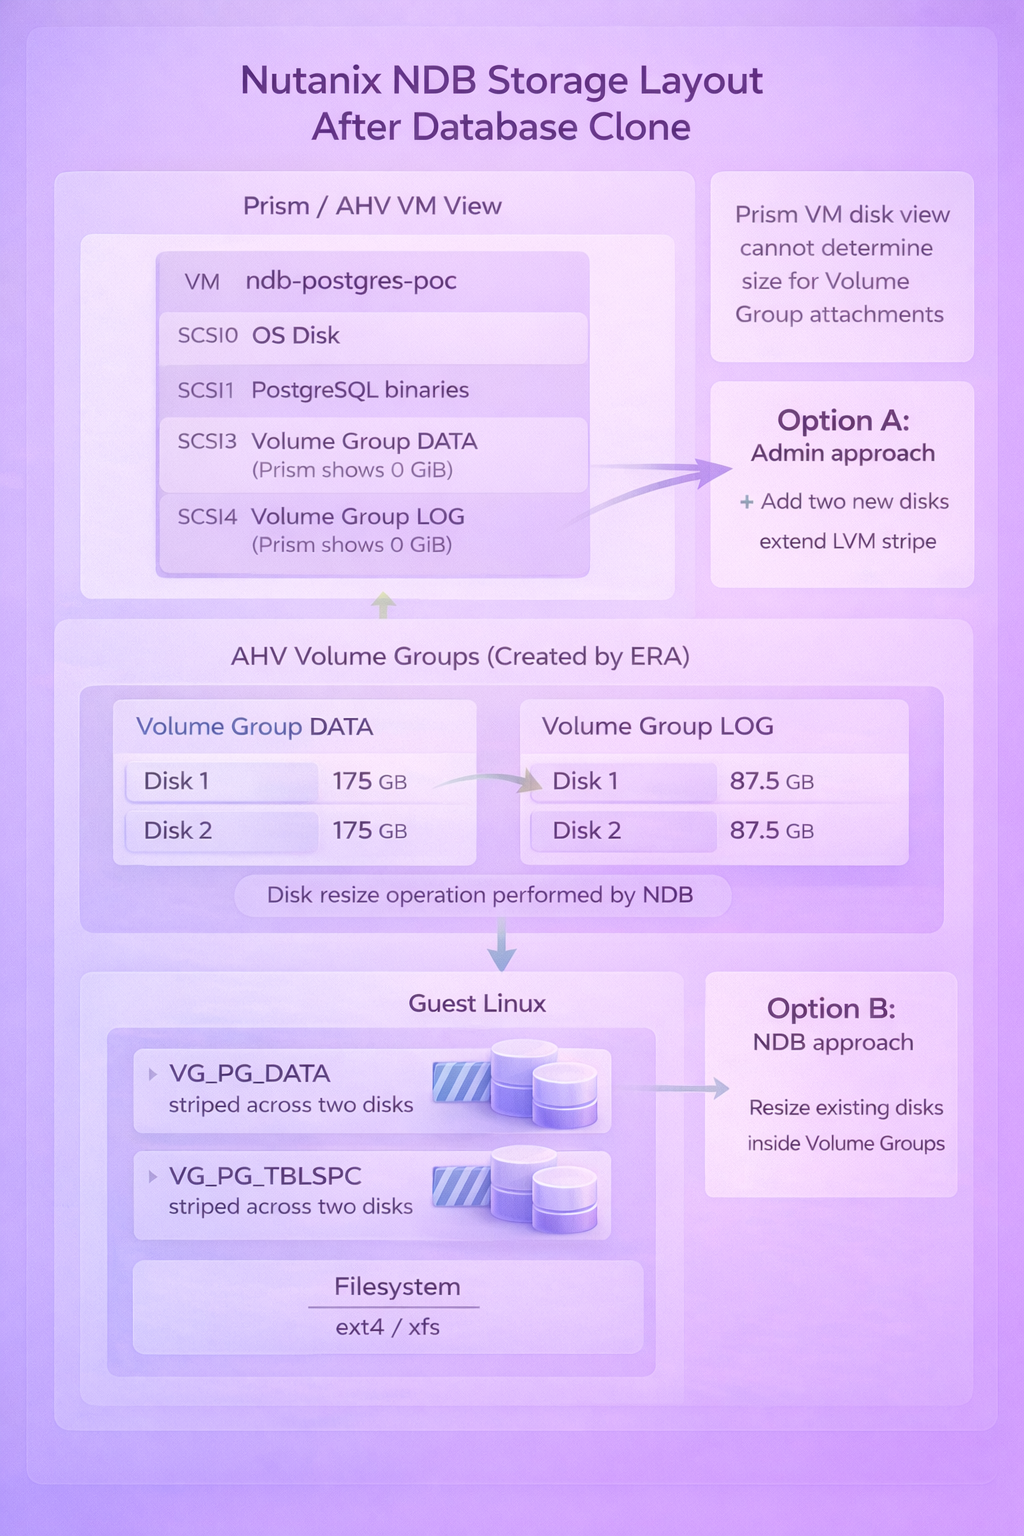
When NDB deploys a PostgreSQL instance, it does not create standard vDisks attached to the VM. Instead, it creates AHV Volume Groups and attaches them via iSCSI. Inside each Volume Group, NDB provisions two disks and configures LVM striping across them for performance.
The result in Prism looks strange: the VM shows disk attachments at scsi.3 and scsi.4 with a reported size of 0 bytes. This is not corruption. Prism simply cannot determine the size of Volume Group attachments the way it can for regular vDisks.
Inside the guest OS, everything looks normal. You see two LVM Volume Groups (VG_PG_DATA for the data directory, VG_PG_TBLSPC for tablespaces), each striped across two physical volumes, with ext4 or xfs filesystems on top.
The key insight: NDB manages storage at the Nutanix layer, but the guest OS owns standard LVM and filesystems. Nothing proprietary at the data level.
The Software Layer Problem
NDB also controls how PostgreSQL binaries get deployed. Rather than installing from OS repositories, NDB mounts a dedicated vDisk containing its own PostgreSQL build at /usr/pgsql-15. The service unit (era_postgres.service) points to these binaries.
This creates a practical issue: you cannot update PostgreSQL through normal package management. The binaries live on a read-only disk managed by NDB. Patching happens through NDB workflows, which means maintaining the full NDB infrastructure just to run yum update.
For an active NDB deployment with multiple databases, cloning, and Time Machine, this tradeoff makes sense. For orphaned databases that just need to keep running, it is unnecessary complexity.
Removing the NDB Layer
The removal process targets the software layer only. Data stays exactly where it is.
Step 1: Stop the NDB-managed service
systemctl stop era_postgres
Step 2: Unmount the NDB binary disk
umount /usr/pgsql-15
Step 3: Install PostgreSQL from OS repositories
On Rocky Linux 8.10:
dnf module enable postgresql:15 -y
dnf install postgresql-server postgresql -y
The binaries now live at /usr/bin/postmaster instead of /usr/pgsql-15/bin/postmaster.
Step 4: Create a systemd override to point at the existing data directory
mkdir -p /etc/systemd/system/postgresql.service.d
cat <<'EOF' > /etc/systemd/system/postgresql.service.d/override.conf
[Service]
Environment=PGDATA=/pgsql/ndb-postgres-poc/data
EOF
systemctl daemon-reload
Step 5: Disable the old service, enable the new one
systemctl disable era_postgres
systemctl enable postgresql
systemctl start postgresql
Step 6: Verify
systemctl status postgresql
psql -c "SELECT version();"
PostgreSQL starts, reads the existing data directory, and runs normally. No data migration. No export/import. The same files, the same tablespaces, the same databases.
Cleaning Up the Agent
NDB installs an agent on each managed VM for communication with the NDB server. Once you have removed the database from NDB management, the agent serves no purpose.
Check if it is running:
ps aux | grep ndb
If you see ndb_agent or ndb_controller processes, stop and remove them:
systemctl stop ndb_agent ndb_controller
yum remove era-agent
rm -rf /opt/era_base
Expanding Storage After NDB Removal
The storage still works after removing NDB, but expansion requires understanding the original design.
NDB provisions storage with LVM striping across two physical volumes. The mount options confirm this:
/dev/mapper/VG_PG_DATA-LV_PG_DATA on /pgsql/ndb-postgres-poc/data type ext4 (rw,relatime,seclabel,stripe=512)
This improves throughput but has implications when you need more space.
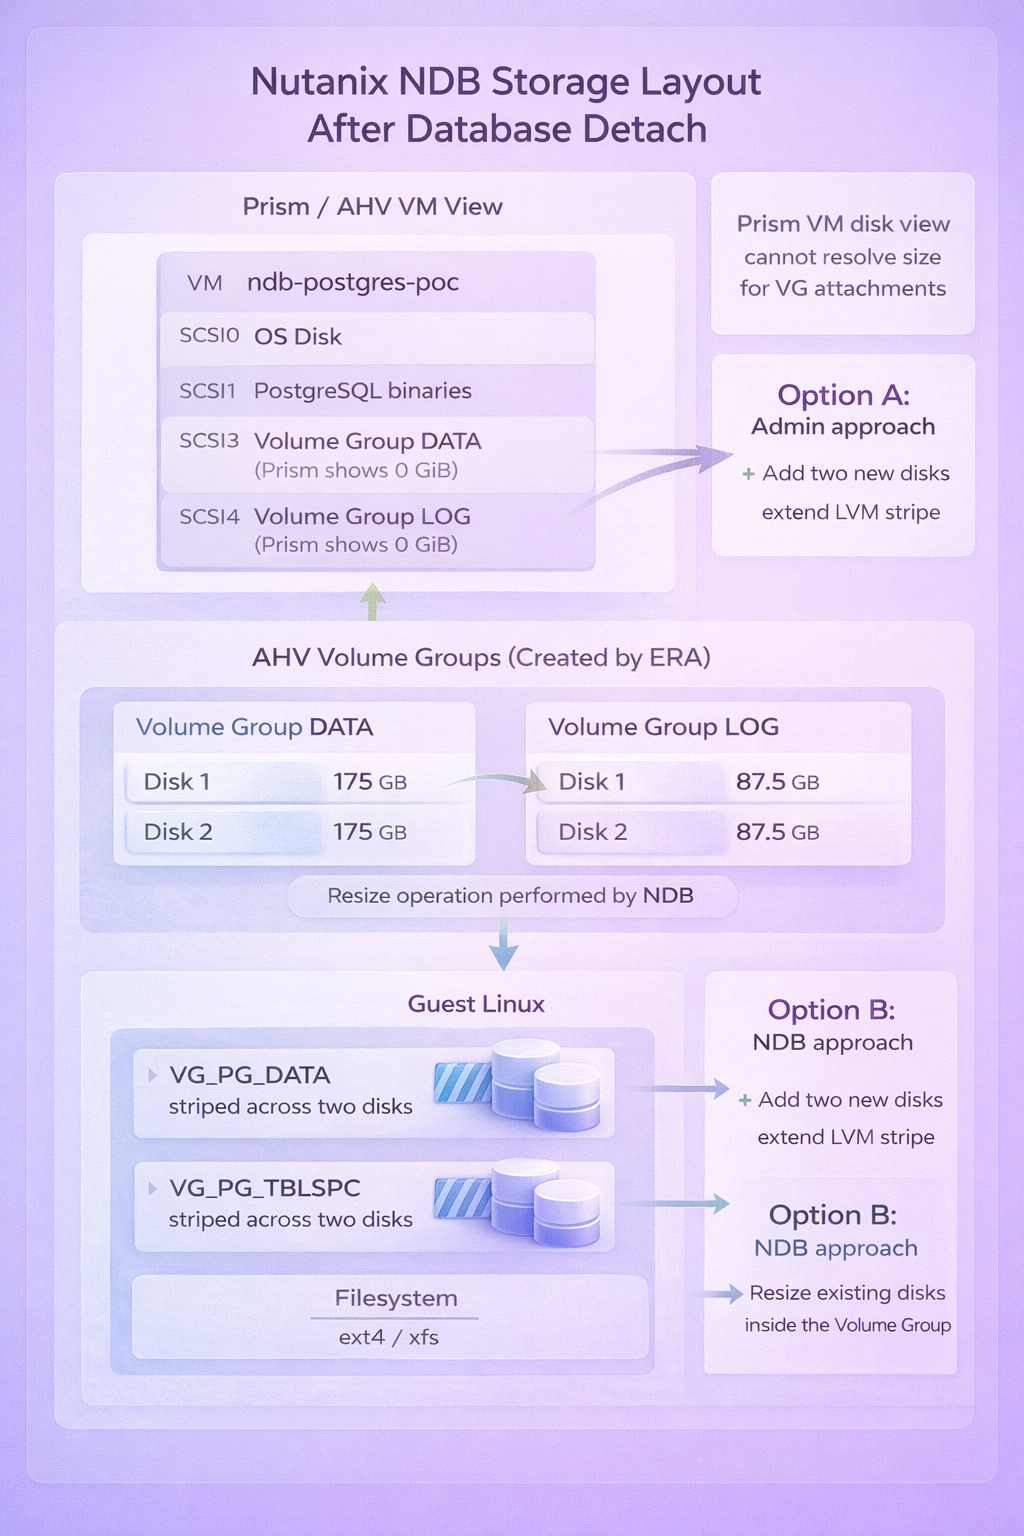
Option A: Resize the existing Volume Group disks (preferred)
Expanding the disks inside the existing Volume Group maintains the stripe configuration. Both disks grow proportionally, and the LV extends cleanly.
From the CVM:
acli vg.disk_update <volume-group-uuid> 0 new_size=300G
acli vg.disk_update <volume-group-uuid> 1 new_size=300G
Inside the VM:
echo 1 > /sys/class/block/sde/device/rescan
echo 1 > /sys/class/block/sdf/device/rescan
pvresize /dev/sde
pvresize /dev/sdf
lvextend -l +100%FREE /dev/mapper/VG_PG_DATA-LV_PG_DATA
resize2fs /dev/mapper/VG_PG_DATA-LV_PG_DATA
Option B: Add new disks (requires attention)
Adding a third disk to a striped LV creates a geometry mismatch. The lvextend command cannot maintain the original stripe configuration and silently does nothing.
The workaround is forcing linear allocation:
pvcreate /dev/sdX
vgextend VG_PG_DATA /dev/sdX
lvextend -l +100%FREE -i 1 /dev/mapper/VG_PG_DATA-LV_PG_DATA
resize2fs /dev/mapper/VG_PG_DATA-LV_PG_DATA
The -i 1 flag tells LVM to extend without striping. The LV becomes a mix of striped and linear segments. It works, but the original performance characteristics are partially lost.
When possible, resize existing disks rather than adding new ones.
Backup Without NDB
With NDB removed, Time Machine is no longer available. For backup, HYCU provides application-aware protection for PostgreSQL. It understands Postgres consistency requirements and can perform proper backups without the NDB layer.
Alternatively, standard VM-level snapshots plus pg_dump for logical backups cover most use cases. The point is: you have options. Nothing about the post-NDB state limits your backup strategy.
What NDB Actually Leaves Behind
After removing NDB, here is what remains on the VM:
- A standard Linux filesystem layout with LVM logical volumes
- The PostgreSQL data directory at
/pgsql/<instance>/data - Tablespaces at
/pgsql/<instance>/tsdata - Standard ext4 filesystems with striping enabled
- The
eraandpostgresusers
What does not remain:
- The mounted binary disk at
/usr/pgsql-15 - The
era_postgres.serviceunit - The NDB agent and controller processes
- Any dependency on the NDB server
The mount output tells the whole story:
mount | grep pgsql
/dev/sdb on /usr/pgsql-15 type ext4 (rw,relatime,seclabel,stripe=256)
/dev/mapper/VG_PG_DATA-LV_PG_DATA on /pgsql/ndb-postgres-poc/data type ext4 (rw,relatime,seclabel,stripe=512)
/dev/mapper/VG_PG_TBLSPC-LV_PG_TBLSPC on /pgsql/ndb-postgres-poc/tsdata type ext4 (rw,relatime,seclabel,stripe=512)
The binary disk (/dev/sdb) is a mount, not an installation. The data and tablespace volumes are standard LVM. Nothing proprietary.
Why This Approach Works
Before converting, you can validate that the database runs independently of NDB:
su - postgres
/usr/pgsql-15/bin/pg_ctl -D /pgsql/ndb-postgres-poc/data start
If PostgreSQL starts and accepts connections, the data directory is healthy and self-contained. NDB was orchestrating the service, not owning the data.
The conversion works because PostgreSQL data directories are portable across installations of the same major version. The OS-packaged PostgreSQL 15 reads the same data format as the NDB-deployed PostgreSQL 15. No conversion, no dump/restore, no compatibility layer.
The only change is where the binaries come from. The data stays exactly where it is.
When You Should and Should Not Do This
Do this when:
- The NDB environment is orphaned and nobody uses Time Machine or cloning
- You need to reduce licensing and management overhead
- You want PostgreSQL updates through standard OS package management
- The database is stable and does not require NDB-specific recovery features
Do not do this when:
- Time Machine is actively used for point-in-time recovery
- Multiple databases share the same NDB server and benefit from centralized patching
- You need rapid cloning for dev/test refresh cycles
- The database is part of a provisioning workflow that depends on NDB profiles
The conversion is one-way. Once you remove NDB, re-enrolling the database requires a fresh deployment or manual re-registration. Make sure NDB is genuinely not needed before proceeding.
The Actual Point
NDB is a layer. It provides real value when you use its capabilities: Time Machine for point-in-time recovery, cloning for dev/test refresh, automated patching across database fleets, provisioning profiles for standardization.
When those capabilities are not being used, the layer adds cost without benefit. And crucially, removing it does not require migrating data, exporting databases, or rebuilding anything. The data directory is just a data directory. The filesystems are just filesystems. PostgreSQL is just PostgreSQL.
That is not vendor lock-in. That is a tool doing what you asked, and getting out of the way when you stop asking.